Showing posts with label WIN. Show all posts

Sunday, 22 July 2012

Astronomicon – 1850 5th Edition Team Tournament Game 3


Game 3 was against Colins Space Marines, here’s the list:

HQ
Vulkan
Librarian, Null Zone, Gate to Infinity
Elites
Ironclad Dreadnought, Heavy Flamer
Assault Terminator Squad, 5x TH/SS
Troops
5 Man Tactical Squad

Fast Attack
Land Speeder, Multi-Melta, Heavy Flamer
Heavy Support
Predator, Lascannon Sponsons
Transports
Drop Pod
Land Raider, Multi-Melta, Extra Armour
Razorback, Lascannon, TL Plasma Gun
Razorback, Lascannon, TL Plasma Gun, Dozer Blade


Pitched Battle Deployment, Primary was Seize Ground, secondary was Anihilation

I rolled for first turn.

Deployment
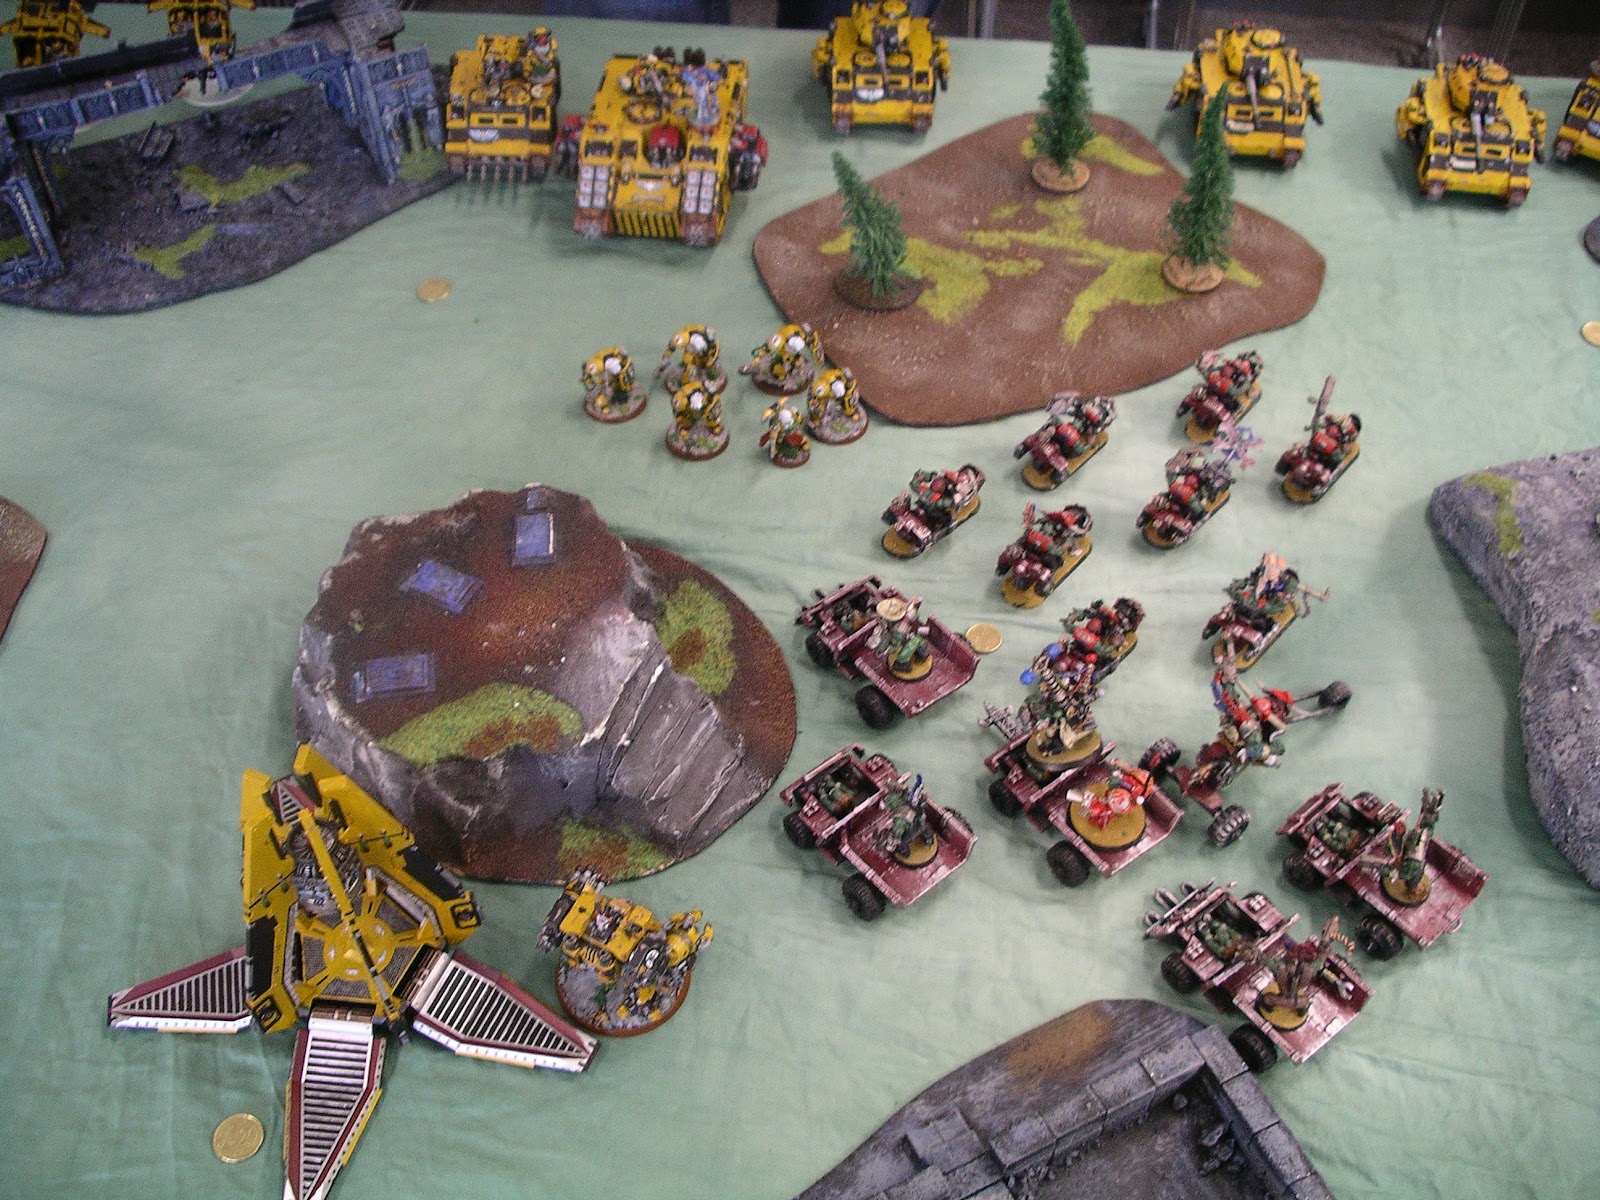
I set up the Bikes on the Left of the Centre, the Trukks on the Right. The Grots were holding an objective down in the Right hand corner with the buggies zooming up the right flank. The Lootas were sat in some woods to the left.

Colin deployed in a line with the Speeders on my left and the Land Raider in the centre with the predators to the right of it, Razorbacks held the tank lines flanks. Bob the Venerable Drednaught was coming in for a turn 1 drop-podding.

Ork Turn 1
I sped across the map, the Bikes going left to right, heading for the Preds, the Trukks going right to left looking to tie up the raider in the centre. The Buggies headed to the right flank looking to take in some side shots on amour. The Lootas managed to down 1 speeder and the Buggies shook the nearest razorback.


Space Marine Turn 1


Bob arrived near my speeding Trukks, the Hammernators and Vulkan hopped out of the Land Raider and moved towards the Bikers. The two remaining speeders hopped the ruins and headed towards the centre. The left hand Razorback hid in the ruins closest to it. Shooting saw 4 of the Trukks get taken out and the Boyz and MegaNobz had to bail out, this unfortunately left them open to shooting from the Dread, who then flamed them. 1 squad of Boyz broke under the fire and headed away. The Hammernators charged into the Bikes and managed to kill 4 Nobz, in return 1 Hammernator went down. The combat having been lost by a vast number of wounds snake eyes was needed, and it appeared! Combat continues!


Ork Turn 2
The fleeing mob continued to do so. The Mega Nobz got a scary look in their eye as they decided it was time for some Dreadnaught Krumpin’. The Pirate Boyz moved through some ruins, looking to get into a fight too. The Mexican Boyz swung round Vulkan and his retinue, ready to get stuck in. The Boyz with Trukk intact headed towards the predators. The Lootas Picked another speeder out of the sky. In combat the Hammernators were all killed and only 1 Nob biker died, leaving Vulkan on his own. The Meganobz and the Pirates managed to take out the dread at the cost of 1 Meganob.


Space Marine Turn 2


The final speeder shot off towards the Lootas at full speed. Whilst the left Razorback rolled forward a bit. Some shots were fired at the remaining Trukk and the Buggies taking out 2 Buggies and the Trukk. Vulkan was finally vanquished in combat by the remaining Orks.

Ork Turn 3
The Pirate Boyz headed towards the drop pod whilst the Meganobz headed towards the Marine lines. The bikes and the Mexican Boyz set out for the Land Raider and the Pirate Boyz head towards the Drop Pod. Lootas shoot at the final speeder but failed to kill it, only shaking it. The Warboss split off from the Bikers to have a crack at the nearest Razorback whilst the Boyz and Bikers got stuck in with the Land Raider. The squad of Boyz on the right headed towards the predator closest to them. The Buggies managed to wreck the Razorback on the Right with some Orky shooting. In combat the Boss Wrecked the Razorback and the Boyz took out a Predator, the Land Raider escaped unscathed


Space Marine Turn 3
The speeder, being unable to shoot zipped over to near the Drop Pod. The Land Raider attempted to Tank shock its way out of trouble but all the Boyz managed to get out the way. The Marines from the destroyed Razorback took some shots at the Warboss but didn’t make a dent, the Boyz mob to the left was crushed by Bolter fire.

Ork Turn 4
The Warboss moved to assault the Marines, the Pirate Boys encircled the speeder and the Meganobz trudged towards the Land Raider. The Final Biker headed towards the living marines on the Right as the Mexican Boyz went for the remaining Predator. The Boss Assaulted and crushed the Marines, the Mexican Boyz finished off the Predator, the Pirates took out the Speeder after the Lootas failed to bring it down again. The Mega Nobz couldn’t break the Land Raiders hull though.


Space Marine Turn 4
The remaining Marines engaged the Last Nob Biker, bringing him down, the Land Raider shot at the MegaNobz but they managed to survive the bullets.


Ork Turn 5
The Warboss gunned his Engines and headed towards the Land Raider, the Nobz trudged over as well. The last of the Mexican Boyz headed towards the few remaining Marines. The Warboss popped the Raider, leaving the Librarian stood out in the cold, the Marine combat was won but they held their ground.

Space Marine Turn 5
The Libby charged the Warboss whilst the combat continued, resulting in a drawn combat, the Librarian however took a Power Klaw to the face and was crushed.


End result, Primary: Win, Secondary: Win, I lost too much so didn’t get a massive victory in terms of points, but there was only 2 Marines left on the board!

Monday, 2 April 2012

MooFool Game 1 – Orks


The first game of the Tourney and I was ready to go, maybe a bit drunk still from the previous night, but I was certainly pretty tired but up for it!

Game Details
Pitched Battle deployment
Primary Objective: Seize Ground (5 objectives to be captured. One objective is placed in the centre of each table quarter and one in the centre of the table.)
Secondary Objective: Annihilation: For this mission both players starts with 3 Battle points each. For every killpoint more than his opponent a player has at the end of the game, the player adds one BP, and his opponent subtracts one BP, up to a maximum of +3 / -3 BPs.

The list of my erstwhile opponent ( Anthony) looked a bit like this:
Disclaimer, this might not be 100% right.

Warboss on Bike, Power Klaw

Big Mek with KFF

5 Nobz and a Painboy on Bikes, with wound shenanigan diversification including two Klaws.

18 Shoota Boyz 1w/ Big Shoota, Nob with PK and Bosspole

Battlewagon with Deff Rolla, 2 Big Shootas, Red Paint Job, Armor Plates, Stikkbomb Launcher and Grot Riggers

8 Lootas
8 Lootas

I won the Roll off and opted for first turn and deployment. As always Marbo and the Banewolf went into reserve. I hid the Manticores behind a Building with the Hydras and Lascannons on the Same Flank. The Melta Vets and CCS Sat in front of the Hydras, ready to move out if required but also leaving the CCS in place to issue orders to the HWTs. The Autocannon team held the centre in some cover with a good field of fire. The far right saw the Infantry squad with Autocannon forming a conga line out to the objective with the mounted squad just right of the central terrain.The two Vendettas deployed in the middle area of the table for turbo boosts and the Scout saves, should I be seized.

Right Side
Left Side
The Orks deployed opposite me, with three wagons spaced out for KFF coverage, the Lootas were in cover, and the Bikers in between two of the Wagons with the Boss behind.

Ork Deployment

Turn 1 – Imperial Guard
Scout Move: I boosted one Vendetta to the left to join the rest of my flank, the other went right to get some angles on the Battlewagon sides.

My first turn didn’t really require any repositioning and I opened up with my firepower. A few Lootas died to mixed small fire. They key firing came from the Manticores, after some lucky rolls including a Hit on the scatter and some triple cluster missiles the Bikers were looking at a quantity of wounds. With the weapon being Strength 10, any failed saves were death for the bikers. They had just the 4+ save from the passive smoke cloud, I had managed to inflict at least two wounds on each member of the squad and Warboss. The end result was excellent, with only 3 of the bikers remaining on the field.

The resulting Leadership test, even with a Bosspole Reroll wasn’t sufficient and the bikes promptly fled off the board.

Turn 1 – Orks
All three of the Battlewagons rolled forward. The Lootas opened up and managed to immobilize my Right Vendetta. They other squad fired off some shots but failed to make any real impact.

Turn 2 – Imperial Guard
Once again I was static and decided that I would continue to shoot, I managed to immobilize two of the Battlewagons and shake another. I killed 6 of the Lootas on the left, the Lootas on the right survived unscathed.

Turn 2 – Orks
The battlewagons, immobile, attempted repairs, the Shaken Wagon rolled forward. The Lootas continued to shoot, managing to Wreck the Chimera of a squad of Vets and take out the Lascannon team.

Turn 3 – Imperial Guard
Marbo and the Banewolf show up. Marbo pops up in cover just next to the KFF Wagon. The Banewolf Rolls on heading directly towards the Wagons. The Vets disembark from the ruined Chimera and head into cover. Shooting results in one Battlewagon exploding, causing a few casualties. Marbo takes this opportunity to chuck a demo charge into the recently disembarked Orks which whiffs badly, but the Manticore manages to pick up a chunk of the boyz and other shooting sees the mob whittled down to 6. The Lootas on the right take some Damage, enough to make them break, they go a huge distance and end up very close to the table edge.

Dice show a BW Crater

Turn 3 – Orks
The Broken Lootas decide that they want to live to fight another day and flee. The Big Mek scarpers into the nearby wagon which unleashes a volley of shootas (big and small) into the Vets, they survive the firestorm. The six Orks head towards the Bane Wolf, ready to cause some pain. The immobilized wagon at the back has the riggers come through for it and starts working again, but can’t move that turn. The mob of 6 Orks charge into the Banewolf, they manage to immobilize and shake it.

Turn 4 – Imperial Guard
Marbo heads towards the Orks next to the Bane wolf, the troops squad in the Chimera head for the central objective to claim it. The Vets hit the Battlewagon with full Melta power, making it explode, the Boyz inside take a few casualties from this, the Manticores then have a go, wiping out the squad. The Wagon to the rear gets wrecked by the Lascannons on the Vendetta and the boyz pile out, the second Manticore makes short work of most of them. Marbo charges into the Nob who is engaged with the Banewolf and puts him down.

Just before Marbo goes in!

Turn 4 – Orks
The big Mek waddles towards the Vendetta whilst the last squad of boyz attempt to get away from the stricken wagon. In combat the Mek fails to hurt the Vendetta.

Turn 5 – Imperial Guard
The Big Mek takes a few Meltas to the Face and the Hydras/Multi Lasers and Vendettas finish off the remaining boyz.

Turn 5 – Orks
With no greenskins on the board the game ends.

Objective held all game.

Victory to the Imperial guard!

Having no opposition I win the primary, I also killed all his army and took few casualties so I win the secondary, my Battle points also give me a full tabling resulting in a 20-0.
Overall the game was won for me with my Alpha strike, the death and fleeing of the bikes put me in such a strong position early on, especially with no Warboss and pesky Klaws. The immobilize results on the battlewagons were great too, I didn’t end up feeling the pointy end of any Deff Rollas.

The only problem being with a full tabling and a 20-0 in the first round, I end up on table 2 for the next game, meaning I’ll be meeting someone who also went 20-0. That someone happened to be Merv with his “Tranny Marines” Sisters of Battle, more on that in a day or two.


Thursday, 16 February 2012

Warpcon Game 5 – Space Wolves.


Pitched Battle deployment

Primary Objective: Annihilation
Secondary Objective: Seize Ground


After my win over the Eldar I was feeling confident that I could do well and after enjoying a swift pint
to bolster my confidence I prepared for Game 5, being Kill Points I really didn’t want a shooting or
MSU Army to face, just my Luck, I end up against Wolves...


The Space Wolf list looked like:
Arjac Rockfist
Land Raider Redeemer
A few Wolf Guard with fists and Combi Meltas
Wolf Guard with Terminator Armour and Cyclone Missile Launcher
Priest with Jaws and Hurricane
Wolf scouts with a Melta
3 Long Fang Packs with 4 Missiles 1 Lascannon
One Las/Plas Razorback for one Pack of Long Fangs
Wolf Scouts with sniper Rifles
Grey Hunters with a Melta in Rhino
Grey Hunters with a Melta in Las/Plas Razorback

The Wolf Guard were split amongst the Scouts and grey Hunters. Arjac was in the Land Raider with
one Wolf guard Pack.

I got first turn and set up behind the thankfully Line of sight blocking terrain. I tried to hide my
Manticores as best I could with the Heavy Weapons team and CCS anchoring the right flank with
the Hydras and Infantry sitting on a secondary (skittle) objective looking across the left flank. I kept
both squads of Veterans, the PCS the Mechanised Infantry Squad, Banewolf and Marbo in reserve.
Providing fewer targets for initial fire, also with the LoS blocking terrain I would have had to deploy
in the open.

The Wolves deploy with the Long Fangs in cover on each flank with the Razorbacks hidden behind
the cover. The Sniper scouts set up in the central objective. The Grey Hunters in the Rhino deploy in

the middle along with the Terminator Guard pack. Arjac and his Raider opt to stay in reserve, as do
the Wolf Scouts.

My deployment


Imperial Guard Turn 1: I open up the shooting with all available weaponry shooting at the Long
Fangs and trying to force as many saves a possible, a few are failed and the Sergeants of the Packs
get removed.

Space Wolf turn 1: The grey Hunters advance to the central terrain and the Rhino moves up to my
right flank hoping to engage my Heavy Weapons Team. The wolf shooting is ineffectual but manages
to stun a Manticore and knock a wound off a Lascannon team. The CCS Chimera gets popped and
the squad hop out and move towards the cover. A Vendetta gets stunned but stays in the air.

Imperial Guard Turn 2: I jump the Vendetta around moving flat out as I won’t be shooting with
it. The PCS arrives from reserve and takes up position in its Chimera behind the Hydras. Shooting
continues and a couple more Long Fangs die along with some of the infantry attached to the
Terminator in the central objective.

Space Wolf turn 2: The Wolf scouts arrive and move on the best possible table edge, on my distant
left flank. The Rhino moves up and so do the Grey Hunters with Terminator in tow. The Cyclone
Launcher shoots at my Vendetta and manages to immobilise it, and as it move flat out, it crashes
down. The Sniper scouts ping a few shots around the Heavy Weapons team but they make cover
saves.

Imperial Guard Turn 3: Marbo and the Banewolf arrive from reserve, Marbo deploys in the Central
objective between the Snipers and the Grey Hunters with Terminator. Both squads of veterans arrive
and zip onto the board. Marbo throws his demo charge at the Grey Hunters and kills a few of them
and the other combined shooting whittles the squad down to just the Terminator. The Scouts on the
left flank take some shooting and end up with just the Wolf Guard standing.

Space Wolf turn 3: The Rhino moves up a little bit, one of the Long Fangs breaks from his cover to
hide behind the building with him being the only remaining squad member. The Razorback with Grey
Hunters in on my right breaks cover and heads for one of the Space Wolf Objectives. The Priest in
the Rhino invokes the power of Jaws and takes out a Lascannon and an Autocannon.

Imperial Guard Turn 4: The last Chimera arrives and moves up to provide support where needed.
The vets roll forward as does the Banewolf, looping round the right. Marbo uses move through
cover and gets closer to the Lone Terminator. The Shooting phase sees Marbo take a pot shot at the
Terminator, nothing happens. The Wolf Guard from the scouts gets picked off. And some shooting
happens to the Wolf Guards Rhino, wrecking it. Marbo then Charges into combat and strikes first,
causes two wounds, and Snake eyes!

Space Wolf turn 4: Arjac and his Land Raider arrive and power it towards my army at full speed.
The Grey Hunters from the Rhino hop out and move towards my line. The Razorback sits on the
objective with the Grey hunters still inside. The grey hunters pop another Chimera and proceed to
assault the Heavy Weapons teams, creating a big melee with the Lascannon team piling in as well
and multi charging a Chimera. This results in a dead Chimera and the death of the Lascannon HWT.
The Autocannon team passes Morale and manages to hold.

Arjac turns up
Imperial Guard Turn 5: The army pours fire into the Land Raider and fails to make a dent, Marbo
moves up to assault the sniper scouts and fails to kill anything with his shooting. The Vets move up
and with the CCS charge into the Grey Hunters managing to win combat.

Space Wolf turn 5: Arjac and his Raider move up and jump out, he Chucks his hammer at a chimera
and explodes it. The Veterans inside deploy behind the wreck. The Banewolf proceeds to lose its
turret but soldiers on. The squad then mutli charges and catches the other Vet Squad, leaving just 1
Sergeant alive who manages to outrun the Wolves and heads for the table edge.

The Veteran Sergeant Flees
Imperial Guard Turn 6: I unload every bit of firepower I have left into Arjac and his boys, making
sure I have plenty of distance on them so I can’t be assaulted. I rally the single Veteran Sergeant and
he runs for cover. Marbo continues to fight but combat is still drawn.

But Rallies just at the table edge.
Space Wolf turn 6: Arjac can’t reach anything in combat it so they try and shoot and manage to
immobilise a Manticore. Marbo combat continues and nothing happens.

Game ends!


Based on the Kill points I just managed to scrape a primary win as well as holding onto enough
secondaries as well. Another turn and I would have been toast. It was a great game and a really
enjoyable end to my weekends gaming.

On reflection I may have the timings off on the turns and it could be that I actually went second, oh
well it’s the result that counts. I think that I did actually go second. That would explain why things
seem a little odd, too late to change it now.

Wednesday, 15 February 2012

Warpcon Game 4 - Eldar


Spearhead deployment
Primary Objective: Seize Ground (5 objectives to be captured. One objective is placed in the center of each table quarter and one in the center of the table.)
Secondary Objective: Annihilation  


Day 2 of Warpcon started a bit later than Day 1 and after having a bit of a rest I was ready to go.
Still smarting from my defeat yesterday I resolved to play tactically and try to grab a win. My opponent was playing Eldar, this certainly made a difference from the Power Armour that I’d faced so far.

The list, as far as I could remember was:
Eldrad
2 Fire Dragon Squads in Falcons
2 Squads Dire Avengers
2 Squads Guardians, with Starcannons
Wraithlord
2 Fire Prisms
There might have been more infantry, not sure.

I won the roll and chose to deploy first. Due to the nature of the mission, there were a number of objectives that needed to be secured so I deployed giving my Chimeras good paths to reach the objectives as well as engage fast moving targets if necessary and usual Marbo and the Banewolf were in reserve.
The Eldar force opted to reserve completely.

Imperial Guard Turn 1: I move forward knowing that there’s nothing for me to do other than get into position.

Eldar Turn 1: Nothing Happens.

Home Quarter.

Imperial Guard Turn 2: I move forward again securing all objectives aside from the one in the Eldar table quarter.

Eldar Turn 2: One Falcon with Fire Dragons turns up as well as one Squad of Dire Avengers, the Falcon moves flat out up my left flank and the Dire Avengers walk on and run towards the objective.

Imperial Guard Turn 3: Marbo and the Banewolf turn up, I stick Marbo in cover next to the Dire Avengers and the Banewolf moves up to anchor my left flank. Marbo chucks his Demo Charge at the Dire Avengers and kills seven out of ten. Everything else that is in range and has line of sight shoots at the Falcon, destroying it and then reducing the Fire Dragons to 1 model. The Dire Avengers break and flee towards the edge of the table.

"Deployment" by turn 2 with objectives marked
Eldar Turn 3: The Dire Avengers flee off the Table. A trickle of Eldar forces move onto the Table, 1 Falcon with Fire Dragons, the Wraithlord. The Guardians with Eldrad and a Fire prism. The Eldar forces shoot at Marbo and manage to kill him. The lone Fire Dragon shoots at a Chimera and causes some damage but fails to destroy it.

Imperial Guard Turn 4: With some more Targets and objectives held by troops the main focus of the turn is shooting. The Lone Fire Dragon gets taken out, a Fire Prism also gets destroyed. The second Fire Dragon squad takes a lot of hits and the Manticores manage to get a triple rocket off on one squad of guardians causing many wounds and eliminating the squad. Eldrad also gets shot up and his squad soak most of the wounds. With the second Falcon having its rear armour exposed it takes a weapon destroyed result.

Eldar Turn 4: Another squad of Guardians turn up as does the Fire Prism with some Dire Avengers. The Fire Prism manages to blow a Chimera open that is sat on the main objective and a couple of guardsmen go down to the wraith lord. The vets sat on the furthest objective on the opposite table edge take a couple of wounds but do well making saves after getting pie plated.

Opponents Half objective

Imperial Guard Turn 5: There are plenty of targets available for shooting so there is a great fusillade of fire from all units, managing to take out Eldrad and what’s left of his squad. The 2nd Fire prism gets finished off as does the Falcon. There isn’t much left on the field for the Eldar at this point.

Eldar Turn 5: The Wraithlord gets confused without a Farseer and doesn’t do anything; the last squad of Guardians arrive from reserve and head for the objective. The remaining squad of Dire Avengers goes to hide in some woods. When shooting the Fire Prism scatters and misses hitting the Vets who are hiding.
We roll for another turn, and get one...

Left flank, Anchored

Imperial Guard Turn 6: I continue to shoot, taking out the Dire Avengers, Guardians and Fire Prism, leaving just the Wraithlord standing.

Eldar Turn 6: The Wraithlord attempts some shooting, fails to make an impact.
Game ends with an astounding victory for the Imperial Guard.

The only remaining Eldar model is the Wraithlord, I’m sure another round of shooting would have dealt with him too.


Tuesday, 31 January 2012

Warpcon Game 1 - Chaos Space Marines


Bright and early on Saturday I arose, grumbled, and headed out in the rain to play some 40k.

After registering and stumbling into the area formerly known as the UCC canteen I said hello to a few folks and then checked the matchups. Table Number 13, unlucky for some, against Chaos Space Marines.

Pitched Battle deployment
Primary Objective: Seize Ground (3 objectives placed along the center line of the table, 18 inches apart and 18 inches from the short table edge)
Secondary Objective: Capture and Control


The Chaos list looked something like this:
2 Deamon Princes with Lash and wings
3 Terminators with Combi Meltas
Land Raider
5 Marines with 1 Melta
Rhino
6 Plague Marines with an Icon, Powerfist and 2 Meltas
Rhino
7 Khorne Berserkers, Icon
3 lots of 3 Obliterators.


I lost the roll off but my opponent, Colin, said I could deploy and take first turn.


I deployed in a corner, protecting my Manticores from as much direct fire as possible, using the Hyrdas as a shield. I sat my Lascannon HWT and the Autocannon Infantry squad on my home objective for the secondary. The Autocannon HWT hid in some ruins anchoring the centre of the battlefield. The two Chimera Vets were on the left, ready to head out and grab some objectives, the other Infantry Squad and PCS ready to head right, and the CCS sat in the middle, ready to counter attack or drop orders wherever they were needed. The Vendettas sat ready to open up on targets in the first turn. Marbo and the Banewolf stayed in Reserve.

My deployment 1
My deployment 2
Colin Deployed with this Deamon princes on each of his flanks, Obliterators in commanding fire positions on Hills. Both Rhinos were poised to ride out and grab objectives and the Berserkers ready to hop in the Land Raider. In reserve the suicide Terminators and another Squad of Oblits.

Chaos deployment

Guard Turn 1. I started with the Chimeras trundling forward and popping smoke, then, shooting! The first Manticore missed, the second, missed. The Hydras Heavy weapon teams and Vendettas opened up on the Obliterators, taking 5 of the 6 down thanks to just sheer amount of saves needed to be made and some poor dice.


Chaos Turn 1. The Rhinos, Land Raider and Princes moved up, 1 squad of marines hopped out onto the secondary objective. The shooting response from Chaos was lacking in available long ranged firepower at this point. The Prince on my right lashed my Lascannon HWT to the back of the board, putting them out of LoS of everything.


Guard Turn 2. The Banewolf decides to turn up early and rolls up behind the Chimeras on the left, the Lascannon HWT tries to get into position to shoot at anything. I shoot, Mantiore one...MISS Manticore two...MISS. The rest of the force opened up with the Hydras and Vendettas popping both Rhinos the remaining obliterator and the Melta gun from the Infantry squad killing the Land Raider, the Khorne berserkers suffer a wound or two, then I charge, yep I charged, all the guardsmen died.


Chaos Turn 2. The Terminators arrived and popped a Chimera, the Berserkers head in to finish another one but don't suceed. The plague Marines move up and kill a Chimera on my left flank, the vets bail out and hide as best they can.


Guard Turn 3. Marbo arrives and appears in the wreck of the Chimera on the left. The Banewolf continues to roll forward up that flank. The PCS head towards the Berserkers, hop out and prime their flamers. Shooting again, the Manticores prime for the 3rd round of shooting, Missiles away, Manticore 1...Miss number 2...Miss, Bah. The rest of the force opens up, this time the Lascannon HWT is in place, ready to shoot the Deamon prince, Meltas hit the Terminators and 2 go down. The flamers from the PCS open up and toast 1 Berserker, only 2 remain. Marbo grabs his Demo charge and flattens all the plague marines aside from 1, the Autocannons and Vendettas take care of a Deamon prince on the left, the Banewolf helps.


Chaos turn 3. The Berserkers charge the guardsmen, the Deamon prine who is still survives attempts to lash and perils, taking a wound, the Plague marine sergeant kills Marbo, meanie. In assault the doomed guardsmen make some amazing saves and manage to wipe out the squad of Berserkers!


Guard Turn 4. I continue to push up and secure objectives, holding all three Shooting sees the Manticores do nothing, again. I kill off the Deamon prince and remaining terminator as well as the Plague Marine, leaving 1 squad of Chaos marines and the as of yet undeployed Obliterators as a threat.

Chaos turn 4. The Obliterators arrive, deploying near my central line, the fail to make a serious impact with shooting and the Chaos marines hide on the objective.


Guard Turn 5. I melta the Obliterators as hard as I can and they go down, I then proceed to flat out the Vendettas to hopefully get line of sight on the last squad of Chaos marines and finish them off next turn. Everyone else just camps on the primary objectives with victory assured.


Chaos turn 5.  The remaining marines make a desperate move to Melta the closest Vendetta but the 4+ save keeps it alive.


We roll to see if the game ends, and it does. Victory to the Imperial Guard!

Colin, graceful and majestic, even in defeat


Final Result:
Primary Objective: Win 8 - 0
Secondary objective: Draw 3 -3
VPs: 5 - 1
Final score: 16 - 4

One more turn and I would have tabled him, or at least managed 19 – 1 contesting the secondary.

My final positioning, those marines are so dead!

Overall it was great game and I was happy to start on a high.

Tournament results were just posted over on Rankings HQ:
It's official, 15th!

Sunday, 29 January 2012

Waprcon Done!

Warpcon was this weekend, and most of what I've been working towards over the last few months has come to fruition.

First the Rundown of everything, in the coming day's reports on each of my 5 games will appear, with some pictures but I'm exhausted and want to sleep in a bit so just a quick one.

I got my pass, and started off, here it is in all it's glory:
WARGAMES!
The army I took looks like this, quite a daunting prospect all things considered.

1850 Mech Guard

 Here are a few snaps of games in progress, giving an idea of the scale.


Lower tables

Middle Tables

Top tables, up the back.


So i played 5 games, they were as follows:

  • Game 1 - Chaos Space Marines
Pitched Battle deployment
Primary Objective: Seize Ground (3 objectives placed along the center line of the table, 18 inches apart and 18 inches from the short table edge)
Secondary Objective: Capture and Control

  • Game 2 - Space Wolves
 Spearhead deployment
 Primary Objective: : Capture and Control
 Secondary Objective: Annihilation

  • Game 3 - Blood Angels
Dawn of War deployment
Primary Objective: Annihilation
Secondary Objective: Capture and Control

  • Game 4 - Eldar
Spearhead deployment
Primary Objective: Seize Ground (5 objectives to be captured. One objective is placed in the center of each table quarter and one in the center of the table.)
Secondary Objective: Annihilation

  • Game 5 - Space Wolves
Pitched Battle deployment
Primary Objective: Annihilation
Secondary Objective: Seize Ground


Game 1 was a win, Game 2 draw, Game 3 loss, Game 4 win, Game 5 win.


My final position was 15th, out of the 58 attendees. not half bad for my first 1850 tourney, top guard player of the tournament, out of 3, but nonetheless I was ahead of a lot of experienced players in the end.

And to top it all off, we had a raffle for the ETC Team, and I bought myself some tickets, to support it and all, and lo and behold, I won top prize, it's a Beautiful hardback version of "The Horus Heresy; Collected visions"

My shiny prize!


I'm very happy with this and it topped off a great weekend. It also helped that I got a free beer for my list, because it was the neatest one submitted early on, all fancy and that, being Nerdy with Excel has some advantages.

More reports to come in the future of my games, they won't be so detailed, I didn't take too many pictures, I guess I was busy concentrating on playing.

Sunday, 18 December 2011

Moocon, Battle 3

Game 3
Space Wolves, Pitched Battle, Capture and Control


Game 3 was a simple one, hold my own objective and try and take the enemies.

I decided to go for a 10 man squad on my objective, spread out to prevent wolf scouts, with a 40 man shield who could wander up and nick the enemy objective.

Blob of 40, Mortars and Squad of 10

The Bike Wolves started out by heading for me at full speed, showing no fear the entire army opened up with all weapons, leaving 1 Rune priest alive. GO FLASH LIGHTS!

All the guard shoot, a lot
The remaining priest assaults, and combat is lost but the commissar keeps them in check and we hold the line and fight on, eventually killing the chap.

A Rhino of Wolves then heads down, gets shot up and the blob rolls forward into the fight, after 2 rounds of Combat the wolves lie dead with 12 guys still alive and kicking.

Rhino Wolves un load and the Blob gets stuck in

Whilst this is ongoing the Vets Rock up, they torch the Whirlwind with their Meltas, killing 4 of themselves in the process. and then prepare to feel the retribution from a Pack of Wolves.

Whirlwind down, Marines, angry.

The Veteran Seargeant makes it out of the combat and flees away but then Suddenly a Wild Marbo appears. One Demo Charge Later, no wolves left, 7 of them go down.


Wolf Scouts then appear but on the wrong table edge and they trash teh Hydra, but it's too little to late.

Scouts appear on the flank.

The Blob runs up with the CCS providing orders from the command Chimera, they make the run whilst the Vendetta pops the Razor back, The Vet squad gets rallies to avoid being counted  as destroyed and the objective is taken!

The final push by the blob takes the objective.

This game was a nice win and it showed how effective the blob can be with a commissar. Marbo did well and arrived at just the right time, the scouts coming from the other edge meant I had no threat from them and it was a nice win.