Showing posts with label Warpcon 22. Show all posts

Thursday, 16 February 2012

Warpcon Game 5 – Space Wolves.


Pitched Battle deployment

Primary Objective: Annihilation
Secondary Objective: Seize Ground


After my win over the Eldar I was feeling confident that I could do well and after enjoying a swift pint
to bolster my confidence I prepared for Game 5, being Kill Points I really didn’t want a shooting or
MSU Army to face, just my Luck, I end up against Wolves...


The Space Wolf list looked like:
Arjac Rockfist
Land Raider Redeemer
A few Wolf Guard with fists and Combi Meltas
Wolf Guard with Terminator Armour and Cyclone Missile Launcher
Priest with Jaws and Hurricane
Wolf scouts with a Melta
3 Long Fang Packs with 4 Missiles 1 Lascannon
One Las/Plas Razorback for one Pack of Long Fangs
Wolf Scouts with sniper Rifles
Grey Hunters with a Melta in Rhino
Grey Hunters with a Melta in Las/Plas Razorback

The Wolf Guard were split amongst the Scouts and grey Hunters. Arjac was in the Land Raider with
one Wolf guard Pack.

I got first turn and set up behind the thankfully Line of sight blocking terrain. I tried to hide my
Manticores as best I could with the Heavy Weapons team and CCS anchoring the right flank with
the Hydras and Infantry sitting on a secondary (skittle) objective looking across the left flank. I kept
both squads of Veterans, the PCS the Mechanised Infantry Squad, Banewolf and Marbo in reserve.
Providing fewer targets for initial fire, also with the LoS blocking terrain I would have had to deploy
in the open.

The Wolves deploy with the Long Fangs in cover on each flank with the Razorbacks hidden behind
the cover. The Sniper scouts set up in the central objective. The Grey Hunters in the Rhino deploy in

the middle along with the Terminator Guard pack. Arjac and his Raider opt to stay in reserve, as do
the Wolf Scouts.

My deployment


Imperial Guard Turn 1: I open up the shooting with all available weaponry shooting at the Long
Fangs and trying to force as many saves a possible, a few are failed and the Sergeants of the Packs
get removed.

Space Wolf turn 1: The grey Hunters advance to the central terrain and the Rhino moves up to my
right flank hoping to engage my Heavy Weapons Team. The wolf shooting is ineffectual but manages
to stun a Manticore and knock a wound off a Lascannon team. The CCS Chimera gets popped and
the squad hop out and move towards the cover. A Vendetta gets stunned but stays in the air.

Imperial Guard Turn 2: I jump the Vendetta around moving flat out as I won’t be shooting with
it. The PCS arrives from reserve and takes up position in its Chimera behind the Hydras. Shooting
continues and a couple more Long Fangs die along with some of the infantry attached to the
Terminator in the central objective.

Space Wolf turn 2: The Wolf scouts arrive and move on the best possible table edge, on my distant
left flank. The Rhino moves up and so do the Grey Hunters with Terminator in tow. The Cyclone
Launcher shoots at my Vendetta and manages to immobilise it, and as it move flat out, it crashes
down. The Sniper scouts ping a few shots around the Heavy Weapons team but they make cover
saves.

Imperial Guard Turn 3: Marbo and the Banewolf arrive from reserve, Marbo deploys in the Central
objective between the Snipers and the Grey Hunters with Terminator. Both squads of veterans arrive
and zip onto the board. Marbo throws his demo charge at the Grey Hunters and kills a few of them
and the other combined shooting whittles the squad down to just the Terminator. The Scouts on the
left flank take some shooting and end up with just the Wolf Guard standing.

Space Wolf turn 3: The Rhino moves up a little bit, one of the Long Fangs breaks from his cover to
hide behind the building with him being the only remaining squad member. The Razorback with Grey
Hunters in on my right breaks cover and heads for one of the Space Wolf Objectives. The Priest in
the Rhino invokes the power of Jaws and takes out a Lascannon and an Autocannon.

Imperial Guard Turn 4: The last Chimera arrives and moves up to provide support where needed.
The vets roll forward as does the Banewolf, looping round the right. Marbo uses move through
cover and gets closer to the Lone Terminator. The Shooting phase sees Marbo take a pot shot at the
Terminator, nothing happens. The Wolf Guard from the scouts gets picked off. And some shooting
happens to the Wolf Guards Rhino, wrecking it. Marbo then Charges into combat and strikes first,
causes two wounds, and Snake eyes!

Space Wolf turn 4: Arjac and his Land Raider arrive and power it towards my army at full speed.
The Grey Hunters from the Rhino hop out and move towards my line. The Razorback sits on the
objective with the Grey hunters still inside. The grey hunters pop another Chimera and proceed to
assault the Heavy Weapons teams, creating a big melee with the Lascannon team piling in as well
and multi charging a Chimera. This results in a dead Chimera and the death of the Lascannon HWT.
The Autocannon team passes Morale and manages to hold.

Arjac turns up
Imperial Guard Turn 5: The army pours fire into the Land Raider and fails to make a dent, Marbo
moves up to assault the sniper scouts and fails to kill anything with his shooting. The Vets move up
and with the CCS charge into the Grey Hunters managing to win combat.

Space Wolf turn 5: Arjac and his Raider move up and jump out, he Chucks his hammer at a chimera
and explodes it. The Veterans inside deploy behind the wreck. The Banewolf proceeds to lose its
turret but soldiers on. The squad then mutli charges and catches the other Vet Squad, leaving just 1
Sergeant alive who manages to outrun the Wolves and heads for the table edge.

The Veteran Sergeant Flees
Imperial Guard Turn 6: I unload every bit of firepower I have left into Arjac and his boys, making
sure I have plenty of distance on them so I can’t be assaulted. I rally the single Veteran Sergeant and
he runs for cover. Marbo continues to fight but combat is still drawn.

But Rallies just at the table edge.
Space Wolf turn 6: Arjac can’t reach anything in combat it so they try and shoot and manage to
immobilise a Manticore. Marbo combat continues and nothing happens.

Game ends!


Based on the Kill points I just managed to scrape a primary win as well as holding onto enough
secondaries as well. Another turn and I would have been toast. It was a great game and a really
enjoyable end to my weekends gaming.

On reflection I may have the timings off on the turns and it could be that I actually went second, oh
well it’s the result that counts. I think that I did actually go second. That would explain why things
seem a little odd, too late to change it now.

Wednesday, 15 February 2012

Warpcon Game 4 - Eldar


Spearhead deployment
Primary Objective: Seize Ground (5 objectives to be captured. One objective is placed in the center of each table quarter and one in the center of the table.)
Secondary Objective: Annihilation  


Day 2 of Warpcon started a bit later than Day 1 and after having a bit of a rest I was ready to go.
Still smarting from my defeat yesterday I resolved to play tactically and try to grab a win. My opponent was playing Eldar, this certainly made a difference from the Power Armour that I’d faced so far.

The list, as far as I could remember was:
Eldrad
2 Fire Dragon Squads in Falcons
2 Squads Dire Avengers
2 Squads Guardians, with Starcannons
Wraithlord
2 Fire Prisms
There might have been more infantry, not sure.

I won the roll and chose to deploy first. Due to the nature of the mission, there were a number of objectives that needed to be secured so I deployed giving my Chimeras good paths to reach the objectives as well as engage fast moving targets if necessary and usual Marbo and the Banewolf were in reserve.
The Eldar force opted to reserve completely.

Imperial Guard Turn 1: I move forward knowing that there’s nothing for me to do other than get into position.

Eldar Turn 1: Nothing Happens.

Home Quarter.

Imperial Guard Turn 2: I move forward again securing all objectives aside from the one in the Eldar table quarter.

Eldar Turn 2: One Falcon with Fire Dragons turns up as well as one Squad of Dire Avengers, the Falcon moves flat out up my left flank and the Dire Avengers walk on and run towards the objective.

Imperial Guard Turn 3: Marbo and the Banewolf turn up, I stick Marbo in cover next to the Dire Avengers and the Banewolf moves up to anchor my left flank. Marbo chucks his Demo Charge at the Dire Avengers and kills seven out of ten. Everything else that is in range and has line of sight shoots at the Falcon, destroying it and then reducing the Fire Dragons to 1 model. The Dire Avengers break and flee towards the edge of the table.

"Deployment" by turn 2 with objectives marked
Eldar Turn 3: The Dire Avengers flee off the Table. A trickle of Eldar forces move onto the Table, 1 Falcon with Fire Dragons, the Wraithlord. The Guardians with Eldrad and a Fire prism. The Eldar forces shoot at Marbo and manage to kill him. The lone Fire Dragon shoots at a Chimera and causes some damage but fails to destroy it.

Imperial Guard Turn 4: With some more Targets and objectives held by troops the main focus of the turn is shooting. The Lone Fire Dragon gets taken out, a Fire Prism also gets destroyed. The second Fire Dragon squad takes a lot of hits and the Manticores manage to get a triple rocket off on one squad of guardians causing many wounds and eliminating the squad. Eldrad also gets shot up and his squad soak most of the wounds. With the second Falcon having its rear armour exposed it takes a weapon destroyed result.

Eldar Turn 4: Another squad of Guardians turn up as does the Fire Prism with some Dire Avengers. The Fire Prism manages to blow a Chimera open that is sat on the main objective and a couple of guardsmen go down to the wraith lord. The vets sat on the furthest objective on the opposite table edge take a couple of wounds but do well making saves after getting pie plated.

Opponents Half objective

Imperial Guard Turn 5: There are plenty of targets available for shooting so there is a great fusillade of fire from all units, managing to take out Eldrad and what’s left of his squad. The 2nd Fire prism gets finished off as does the Falcon. There isn’t much left on the field for the Eldar at this point.

Eldar Turn 5: The Wraithlord gets confused without a Farseer and doesn’t do anything; the last squad of Guardians arrive from reserve and head for the objective. The remaining squad of Dire Avengers goes to hide in some woods. When shooting the Fire Prism scatters and misses hitting the Vets who are hiding.
We roll for another turn, and get one...

Left flank, Anchored

Imperial Guard Turn 6: I continue to shoot, taking out the Dire Avengers, Guardians and Fire Prism, leaving just the Wraithlord standing.

Eldar Turn 6: The Wraithlord attempts some shooting, fails to make an impact.
Game ends with an astounding victory for the Imperial Guard.

The only remaining Eldar model is the Wraithlord, I’m sure another round of shooting would have dealt with him too.


Tuesday, 14 February 2012

Warpcon Game 3 – Blood Angels


Dawn of War deployment
Primary Objective: Annihilation
Secondary Objective: Capture and Control

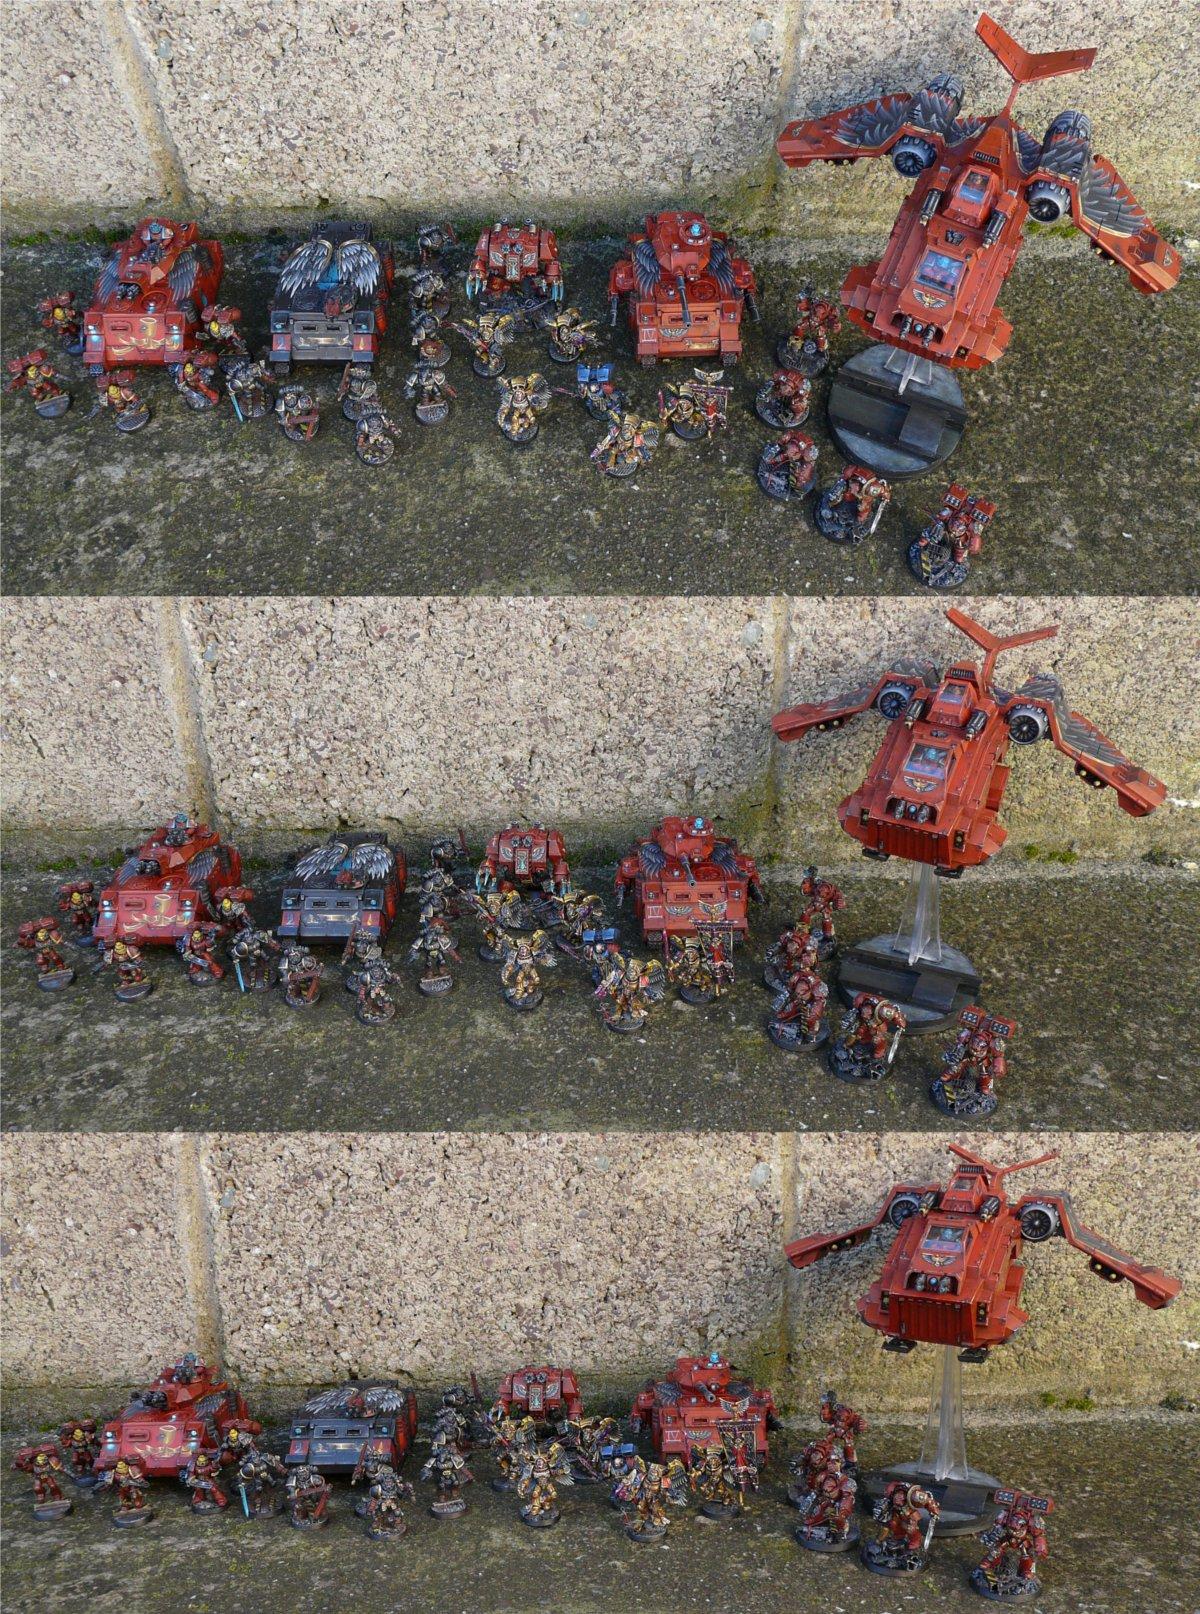
Game 3 was against Blood Angels, the most beautiful looking Blood Angles I have ever seen, you can see a picture here: 

The army list was as follows

Stormraven
Furioso Dreadnaught
Assault Terminators 2 with TH/SS
Death Company in Rhino
Marines in Razorback
Predator
Librarian
Sanguinary Guard with Infernus pistols
Honourguard with Melta Guns


We rolled off to deploy and I ended up with first turn, I deployed up front with a gunline arrayed, ready to open fire on any Marines that showed up. Marbo and Banewolf are in reserve. No marines were deployed, opting for them to roll on turn 1, with a squad of Assault marines and a Squad of Sanguinary Guard in reserve for deep striking.

Imperial Guard Turn 1: The rest of my force rolls and flies onto the board, I tried to get my Manticores hidden away and give everything else a god field of fire, with nothing to shoot at the turn ends.

Turn 1 arrival.


Blood Angels Turn 1: The army rolls on with a few tanks on my left flank. The Stormraven heads right up the middle. A predator manages to see a Vendetta and smashes it out of the sky due to it going flat out.

Imperial Guard Turn 2: The Chimeras move up and get into position. Everything that can fire does so, managing to take out the Stormraven forcing the Terminators with Librarian and dreadnought to get out and walk. Not much else happens in terms of shooting.

Blood Angels Turn 2: The Death Company move up towards my infantry, the terminators and Dreadnaught stomp forward towards my centre line. More shooting whittles down some of my troops and pops a Chimera as well as a Hydra.

Imperial Guard Turn 3: Marbo appears this turn, I deploy him overlooking the Terminators. Marbo loads up his Demo charge and throws it, at himself... He makes his cover save, thankfully. The rest of the army sits pretty still and tries to fire. This fails to make an impact, a fair few armour and FNP saves are made, a couple of the Terminators go down from some Melta fire

Blood Angels Turn 3: The deep striking reserves arrive behind my Manticores and have lots of Juicy targets. The dreadnaught and Terminators move up, as do the Death Company. The Sang guard and marines take out a couple of tanks. The Dreadnaught does the same, the terminators shoot at some of the infantry as they advance. The Death Company sweep in and destroy the Autocannon team.

Imperial Guard Turn 4: The Banewolf arrives and moves up to toast the Sanguinary Guard. Marbo moves towards the Terminators with the intention of throwing his life away, everyone else opts for shooting. The Banewolf shoots his Chem cannon at the Sang Guard, 5 dead marines... turns out no, 2+ save, I just wasted my shots there without realising, such a bad mistake, I’m still beating myself up about this. The rest of the shooting manages to take out a few of the Assault Marines but with FNP this is proving to be a hard task. Marbo charges, fights, and kills the Librarian then gets crushed by the Terminators.

Blood Angels Turn 4: The army runs rampant throughout my lines killing all sorts of things, it’s really not looking good for me, by this time I had really given up and I can’t really remember what went on after this turn, needleless to say it was a serious defeat and in the end I was tabled.


End Result: Loss

This was the last game of the day, and as Kill points, by far my favourite mission. Because of some early mistakes and underestimating the power of the Blood Angels I spread myself out and left my rear exposed to Deepstrike, I should have just made a castle, wrapped my tanks in troops and shot as much as I could. I was tired after 2 games and felt a bit burnt out, just wish I’d thought about it more and played better but it was a learning experience.


Monday, 13 February 2012

Warpcon Game 2 – Space Wolves.


It’s been a while in coming, this report; I’ve been very busy doing not a lot of things really but haven’t had time to get these reports up. So here’s Game 2 from Warpcon.

Spearhead deployment
Primary Objective: : Capture and Control
Secondary Objective: Annihilation


Game two of Warpcon was against Space Wolves, one of my least favourite opponents as mech guard, stoopid Long Fangs!
The list looked something like this:
Rune priest with Jaws and Hurricane
Rune priest with Lightning and Hurricane
5 Wolf Guard with Power Fists and Combi Meltas
3 Long Fang Packs with 5 Missile Launchers
Transport of 3 Las/Plas Razorbacks
4 Packs of 7 Grey Hunters
Transport of 4 Rhinos
2 Squads of 5 Wolf Scouts with 1 Melta

The Wolf Guard were split up and attached to the Scout Squads and three of the Grey Hunter Squads.
The Scouts opted infiltrate, and 1 Rhino was held in reserve.

Objectives were placed, mine was in-between two hills, and his was close to the centre of the table.

The Wolves were going first and deployed aggressively in their table quarter, with two squads the Long Fangs sat back in a building in the rear corner ready to open fine.

I set up in a vehicle Castle in the corner, trying to cover my immediate access to my tanks by filling up the short edge with a conga line of guard and the long edge with tanks. The Lascannon Team went on the Objective and the Autocannon Team was set up with a field of fire over to the Space Wolf positions. All the Chimeras bar the one containing the CCS were ready to roll out towards the Space Wolf positions, the CCS hang back to provide orders to the weapons team and offer a reactionary blast of Meltas. The Vendettas were deployed further away from the army in preparation for a scout move against the first Turn shooting. Marbo and the BaneWolf were in reserve.

Deployment

Space Wolf Imperial Guard Turn 1: Initiative Stolen! Owing to 1 lucky dice, Initiative was stolen and Guard secured the first turn. The chimeras rolled forward towards the centre of the table and the Space Wolf objective, everything else hung back and opened fire. The Manticores managed to smash the Long Fangs at the back and dish out 6 deaths out of the 12 models in the Building. The rest of the army, I forget who did what exactly, shook the Razorbacks, destroyed one and managed to pick off a couple more Long Fangs.

Space Wolf Turn 1: most of the Rhinos move up into position towards the advancing Guard including the Long Fangs in a Razorback. The Long Fangs at the back opened fire but failed to take anything out. The rest of the army really didn’t have much to bring to bear as it had all moved about or was shaken.

Imperial Guard Turn 2: The Chimeras rolled up a bit more and prepared to open fire, the rest of the force did just that. The long Fangs were down to 1 Missile Launcher at the end of shooting, and a Rhino lost a weapon and a Razorback was destroyed.

Space Wolf Turn 2: The Rhinos moved up and a pack of Wolf Scouts arrived, in the worst possible place for them, the short edge at the other end of the table. On the Central terrain a squad of Grey Hunters hopped out and so did the Long Fangs, setting up fire positions. Shooting was more effective this round, taking out a Vendetta and shaking a Chimera.

Imperial Guard Turn 3: The Bane Wolf arrived and powered towards the centre, hoping to melt some pesky Grey Hunters, the Chimeras manoeuvred for position setting up the Melta Vets to deal some malty death. Shooting wasn’t so good, with a lot of missed shots but another Razorback was taken out and the exposed Long Fangs were whittled down to just 1 man.

Battle for the Middle


Space Wolf Turn 3: The second lot of Wolf Scouts arrived and exposed a serious issue with my wall of tanks, there was a gap, the Tanks had just enough space in front of them before the Autocannon HWT, the scouts snuck in, and this was bad news. The Rhinos Moved up and some Grey Hunters went to get involved with smashing up a Chimera or 2. Not much happened during the shooting phase. During assault the Scouts Multi charged the Hydras and the Autocannon team, killing the Autocannon Team and taking out 1 Hydra. A Squad of Grey Hunters killed a Chimera and the Vets inside made some decent saves and set up in the wreck.

Battle for the Middle

Imperial Guard Turn 4: Marbo arrives into the thick of things, facing off against the Grey Hunters and Rune priest that the BaneWolf was also heading towards. The Vets and Chimeras jostled for position again, a couple of the tanks being unable to shoot so they opted for a “reverse advance”. In the shooting phase the Wolf Scouts got dealt with by the rest of the castle and the PCS. The BaneWolf and Marbo took care of some grey Hunters and a Rune priest. This was the last turn of shooting for the Manticores; they killed a couple of Grey Hunters. The final Long Fang in the middle also bit the dust.

Space Wolf Turn 4: the Wolf scouts move through my line to set up for some more charges, targeting my Vendetta and the Lascannon team sat on the objective. A squad of grey Hunters load up and burn it towards the objective as well, lining up to contest. There’s a bit of shooting and Marbo goes down, the Banewolf also gets popped, having done its job. The Wolf scouts charge and Shake the Vendetta, extra Armour makes it a Stun, and clear up the Lascannon team, meaning the objective is currently in Space Wolf hands.

Castle holds strong


Imperial Guard Turn 5: I react with everything that I can, lining up to shoot at the wolf scouts and get as many models onto the objective as possible. The stunned Vendetta goes flat out towards the Space Wolf Objective and ends up on it. I shoot the wolf scouts to pieces with whatever firepower is left, by this time it’s not a lot with the Manticores having used all their missiles and the Hydra that is left having just its hull Heavy Bolter. I thankfully force enough saves that can’t be made.

Space Wolf Turn 5: The Wolf Scouts in the Rhino move up, hop out and charge my Objective holding Infantry squad. The rest of the Army shoots at the Vendetta, hoping to shift it off the point, the flat out save and some poor Armour Pen rolls keep it alive. The Wolf Scouts assault the squad on the objective but fail to cause enough wounds and the combat continues, the Vendetta is assaulted as well but the sixes to hit mean that it lives.

We roll for turn 6, and there isn’t one, final result:
Primary Objective - Draw.
Secondary Objective -Loss

It was a tough game and I was lucky to do as well as I did, in hindsight I think it would have been prudent to kill his troops more and forget about the Long Fangs. I was very lucky with the first lot of Wolf Scouts coming in from the wrong edge, and I am annoyed that I didn’t protect from the other squad properly as they really did the most damage to my force overall. The last minute Vendetta contest and ending of the game on turn 5 was thankfully just what I needed.

Tuesday, 31 January 2012

Warpcon Game 1 - Chaos Space Marines


Bright and early on Saturday I arose, grumbled, and headed out in the rain to play some 40k.

After registering and stumbling into the area formerly known as the UCC canteen I said hello to a few folks and then checked the matchups. Table Number 13, unlucky for some, against Chaos Space Marines.

Pitched Battle deployment
Primary Objective: Seize Ground (3 objectives placed along the center line of the table, 18 inches apart and 18 inches from the short table edge)
Secondary Objective: Capture and Control


The Chaos list looked something like this:
2 Deamon Princes with Lash and wings
3 Terminators with Combi Meltas
Land Raider
5 Marines with 1 Melta
Rhino
6 Plague Marines with an Icon, Powerfist and 2 Meltas
Rhino
7 Khorne Berserkers, Icon
3 lots of 3 Obliterators.


I lost the roll off but my opponent, Colin, said I could deploy and take first turn.


I deployed in a corner, protecting my Manticores from as much direct fire as possible, using the Hyrdas as a shield. I sat my Lascannon HWT and the Autocannon Infantry squad on my home objective for the secondary. The Autocannon HWT hid in some ruins anchoring the centre of the battlefield. The two Chimera Vets were on the left, ready to head out and grab some objectives, the other Infantry Squad and PCS ready to head right, and the CCS sat in the middle, ready to counter attack or drop orders wherever they were needed. The Vendettas sat ready to open up on targets in the first turn. Marbo and the Banewolf stayed in Reserve.

My deployment 1
My deployment 2
Colin Deployed with this Deamon princes on each of his flanks, Obliterators in commanding fire positions on Hills. Both Rhinos were poised to ride out and grab objectives and the Berserkers ready to hop in the Land Raider. In reserve the suicide Terminators and another Squad of Oblits.

Chaos deployment

Guard Turn 1. I started with the Chimeras trundling forward and popping smoke, then, shooting! The first Manticore missed, the second, missed. The Hydras Heavy weapon teams and Vendettas opened up on the Obliterators, taking 5 of the 6 down thanks to just sheer amount of saves needed to be made and some poor dice.


Chaos Turn 1. The Rhinos, Land Raider and Princes moved up, 1 squad of marines hopped out onto the secondary objective. The shooting response from Chaos was lacking in available long ranged firepower at this point. The Prince on my right lashed my Lascannon HWT to the back of the board, putting them out of LoS of everything.


Guard Turn 2. The Banewolf decides to turn up early and rolls up behind the Chimeras on the left, the Lascannon HWT tries to get into position to shoot at anything. I shoot, Mantiore one...MISS Manticore two...MISS. The rest of the force opened up with the Hydras and Vendettas popping both Rhinos the remaining obliterator and the Melta gun from the Infantry squad killing the Land Raider, the Khorne berserkers suffer a wound or two, then I charge, yep I charged, all the guardsmen died.


Chaos Turn 2. The Terminators arrived and popped a Chimera, the Berserkers head in to finish another one but don't suceed. The plague Marines move up and kill a Chimera on my left flank, the vets bail out and hide as best they can.


Guard Turn 3. Marbo arrives and appears in the wreck of the Chimera on the left. The Banewolf continues to roll forward up that flank. The PCS head towards the Berserkers, hop out and prime their flamers. Shooting again, the Manticores prime for the 3rd round of shooting, Missiles away, Manticore 1...Miss number 2...Miss, Bah. The rest of the force opens up, this time the Lascannon HWT is in place, ready to shoot the Deamon prince, Meltas hit the Terminators and 2 go down. The flamers from the PCS open up and toast 1 Berserker, only 2 remain. Marbo grabs his Demo charge and flattens all the plague marines aside from 1, the Autocannons and Vendettas take care of a Deamon prince on the left, the Banewolf helps.


Chaos turn 3. The Berserkers charge the guardsmen, the Deamon prine who is still survives attempts to lash and perils, taking a wound, the Plague marine sergeant kills Marbo, meanie. In assault the doomed guardsmen make some amazing saves and manage to wipe out the squad of Berserkers!


Guard Turn 4. I continue to push up and secure objectives, holding all three Shooting sees the Manticores do nothing, again. I kill off the Deamon prince and remaining terminator as well as the Plague Marine, leaving 1 squad of Chaos marines and the as of yet undeployed Obliterators as a threat.

Chaos turn 4. The Obliterators arrive, deploying near my central line, the fail to make a serious impact with shooting and the Chaos marines hide on the objective.


Guard Turn 5. I melta the Obliterators as hard as I can and they go down, I then proceed to flat out the Vendettas to hopefully get line of sight on the last squad of Chaos marines and finish them off next turn. Everyone else just camps on the primary objectives with victory assured.


Chaos turn 5.  The remaining marines make a desperate move to Melta the closest Vendetta but the 4+ save keeps it alive.


We roll to see if the game ends, and it does. Victory to the Imperial Guard!

Colin, graceful and majestic, even in defeat


Final Result:
Primary Objective: Win 8 - 0
Secondary objective: Draw 3 -3
VPs: 5 - 1
Final score: 16 - 4

One more turn and I would have tabled him, or at least managed 19 – 1 contesting the secondary.

My final positioning, those marines are so dead!

Overall it was great game and I was happy to start on a high.

Tournament results were just posted over on Rankings HQ:
It's official, 15th!

Sunday, 29 January 2012

Waprcon Done!

Warpcon was this weekend, and most of what I've been working towards over the last few months has come to fruition.

First the Rundown of everything, in the coming day's reports on each of my 5 games will appear, with some pictures but I'm exhausted and want to sleep in a bit so just a quick one.

I got my pass, and started off, here it is in all it's glory:
WARGAMES!
The army I took looks like this, quite a daunting prospect all things considered.

1850 Mech Guard

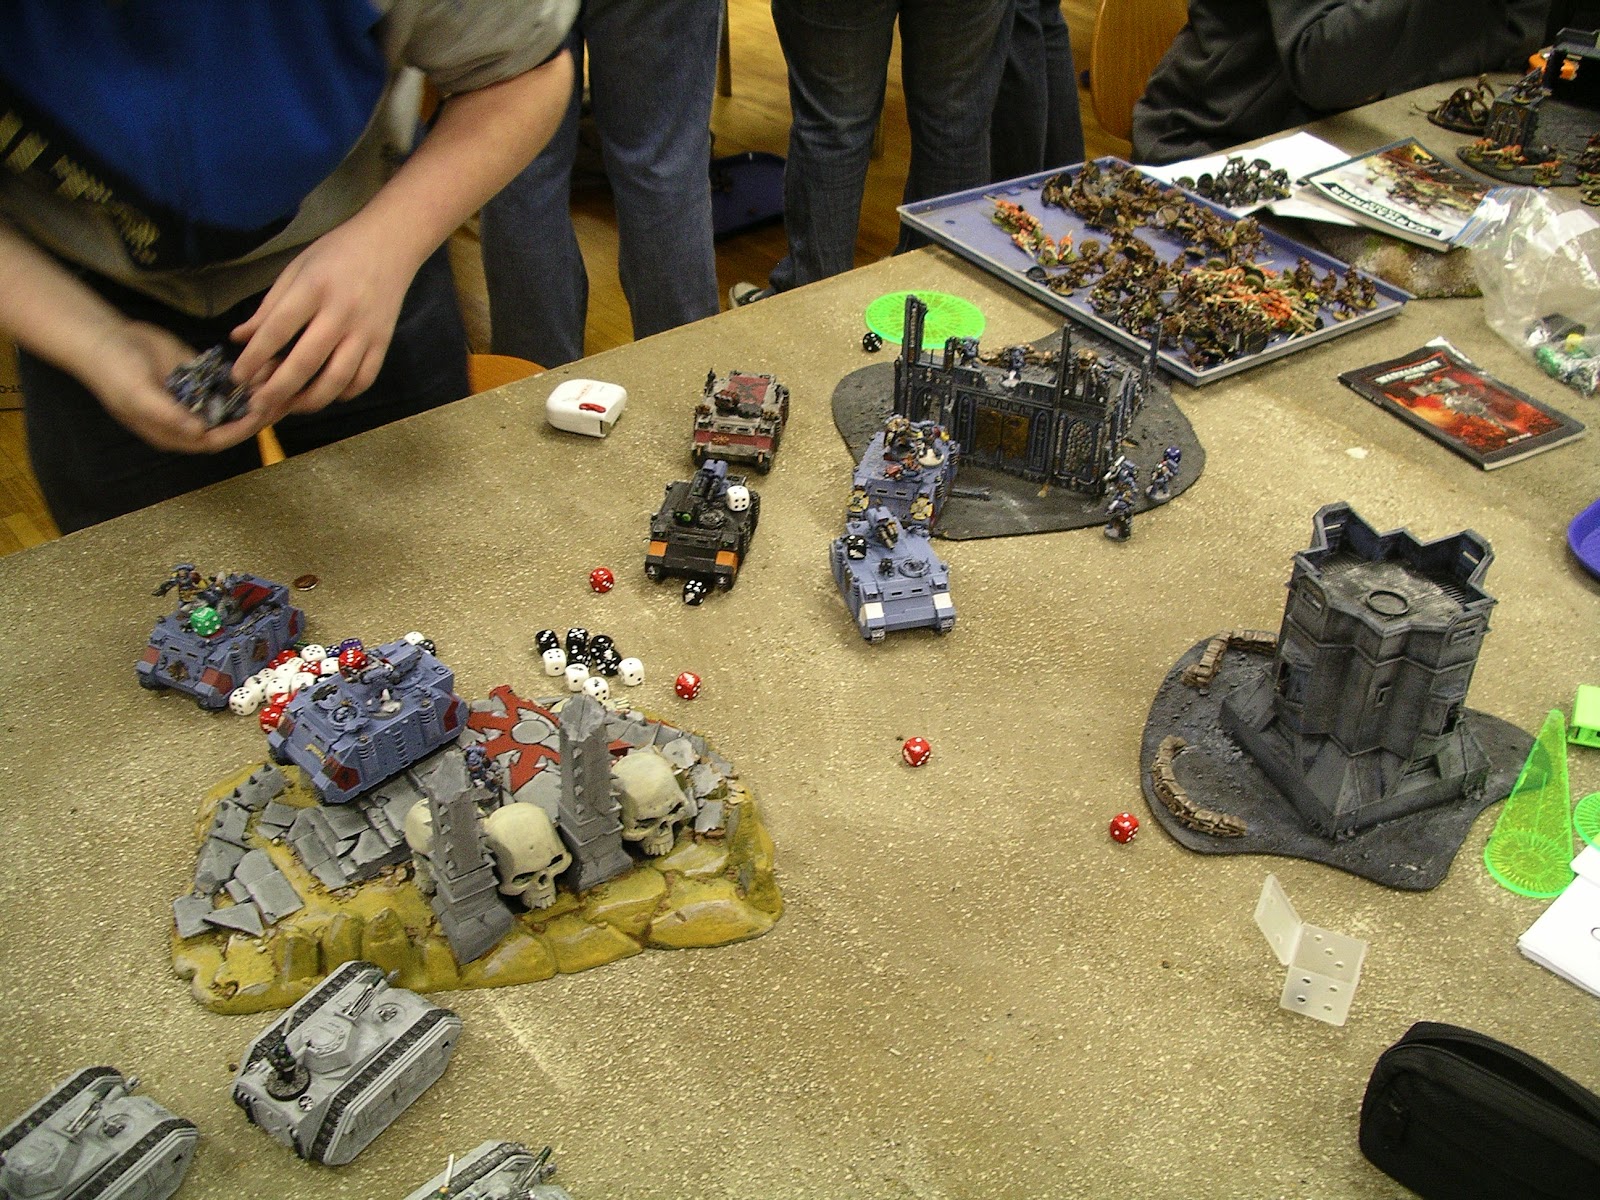
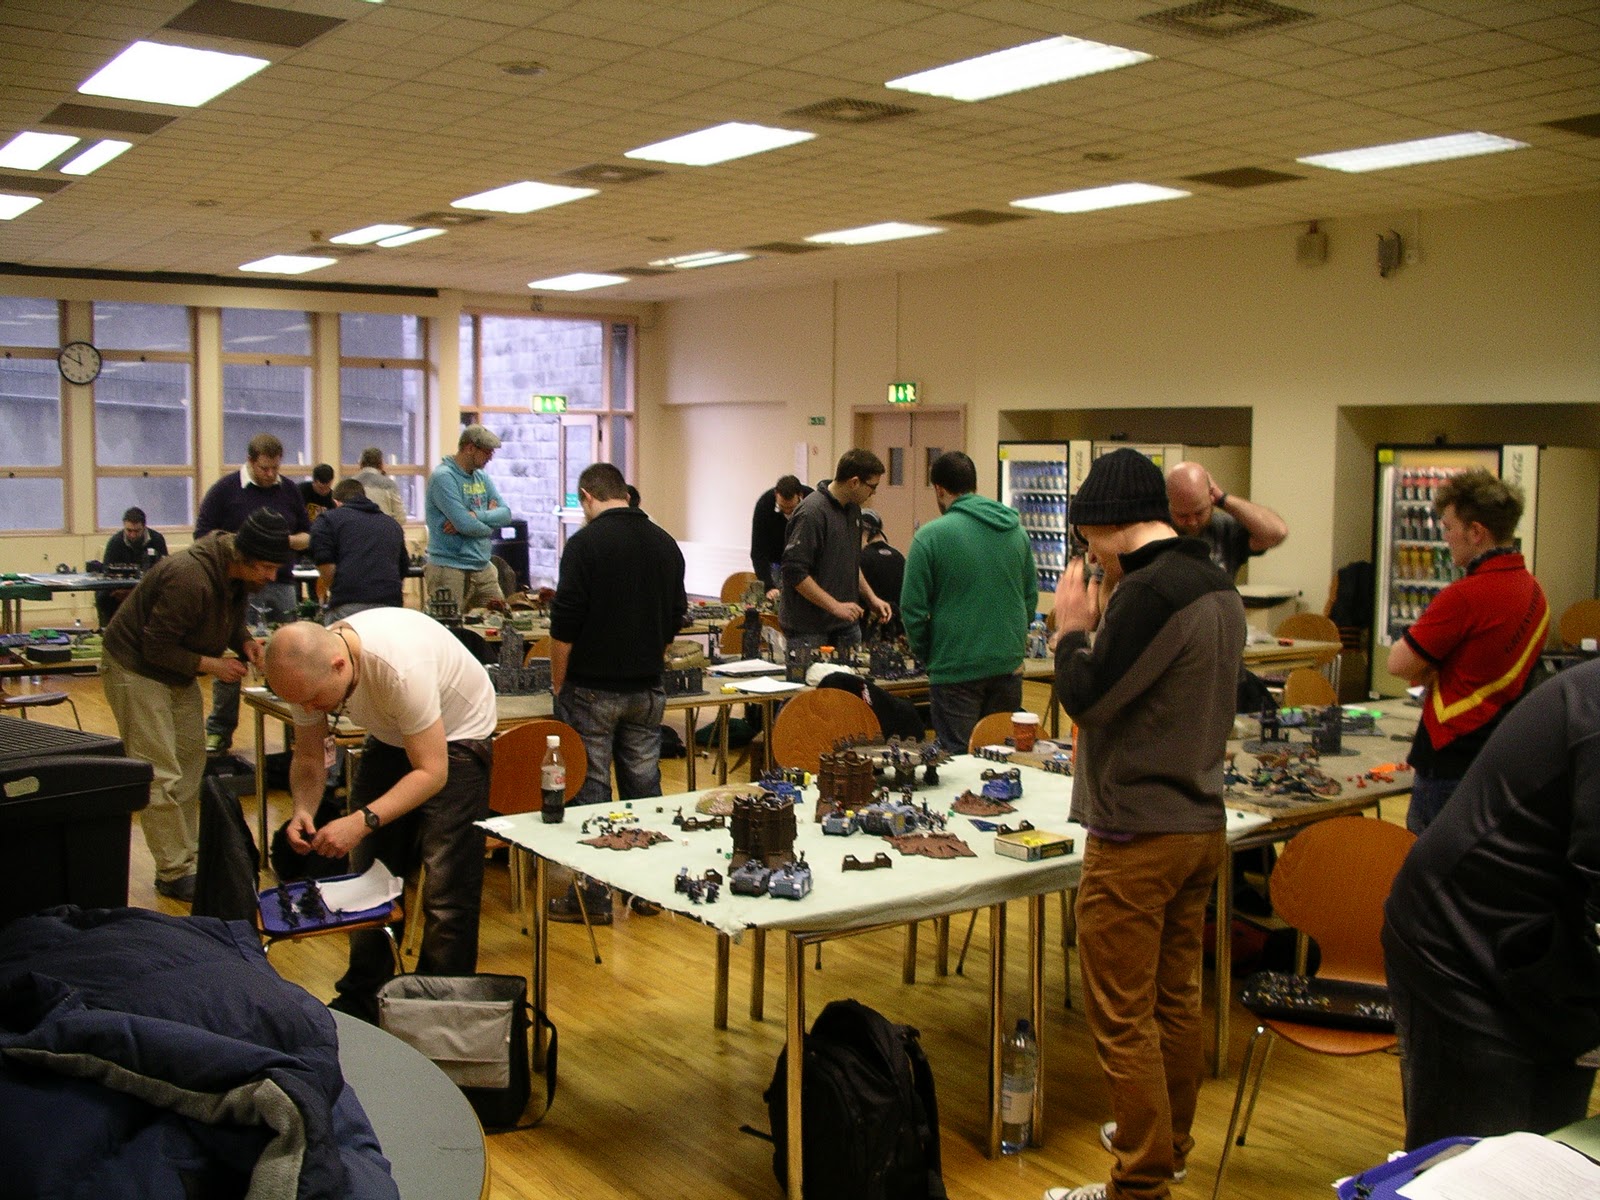
 Here are a few snaps of games in progress, giving an idea of the scale.


Lower tables

Middle Tables

Top tables, up the back.


So i played 5 games, they were as follows:

  • Game 1 - Chaos Space Marines
Pitched Battle deployment
Primary Objective: Seize Ground (3 objectives placed along the center line of the table, 18 inches apart and 18 inches from the short table edge)
Secondary Objective: Capture and Control

  • Game 2 - Space Wolves
 Spearhead deployment
 Primary Objective: : Capture and Control
 Secondary Objective: Annihilation

  • Game 3 - Blood Angels
Dawn of War deployment
Primary Objective: Annihilation
Secondary Objective: Capture and Control

  • Game 4 - Eldar
Spearhead deployment
Primary Objective: Seize Ground (5 objectives to be captured. One objective is placed in the center of each table quarter and one in the center of the table.)
Secondary Objective: Annihilation

  • Game 5 - Space Wolves
Pitched Battle deployment
Primary Objective: Annihilation
Secondary Objective: Seize Ground


Game 1 was a win, Game 2 draw, Game 3 loss, Game 4 win, Game 5 win.


My final position was 15th, out of the 58 attendees. not half bad for my first 1850 tourney, top guard player of the tournament, out of 3, but nonetheless I was ahead of a lot of experienced players in the end.

And to top it all off, we had a raffle for the ETC Team, and I bought myself some tickets, to support it and all, and lo and behold, I won top prize, it's a Beautiful hardback version of "The Horus Heresy; Collected visions"

My shiny prize!


I'm very happy with this and it topped off a great weekend. It also helped that I got a free beer for my list, because it was the neatest one submitted early on, all fancy and that, being Nerdy with Excel has some advantages.

More reports to come in the future of my games, they won't be so detailed, I didn't take too many pictures, I guess I was busy concentrating on playing.

Friday, 20 January 2012

Warpcon list.

So here's the list for Warpcon, 1850 points exactly, a big change from my proposed list  here:
http://tzarkahn40k.blogspot.com/2011/11/proposed-army-list-for-warpcon.html in November
and here:
http://tzarkahn40k.blogspot.com/2011/12/proposed-warpcon-list-provisional.html
on the 29th of December


HQ
Company Command Squad
4x Melta Guns @10pts
Chimera with Multi Laser and Hull Heavy Flamer

Troops 1
Veteran Squad
3x Melta Guns @10pts
Chimera with Multi Laser and Hull Heavy Flamer

Troops 2
Veteran Squad
3x Melta Guns @10pts
Chimera with Multi Laser and Hull Heavy Flamer

Troops 3
Infantry Platoon
Platoon Command Squad
4xFlamers @5pts
Chimera with Multi Laser and Hull Heavy Flamer

Infantry Squad
1x Melta Gun
Chimera with Multi Laser and Hull Heavy Flamer

Infantry Squad
1x Melta Gun
1x Autocannon

Lascannon Heavy Weapons Team

Autocannon Heavy Weapons Team

Elites
Guardsman Marbo

Fast Attack 1
Vendetta Gunship

Fast Attack 2
Vendetta Gunship

Fast Attack 3
Bane Wolf with Hull Heavy Flamer

Heavy Support 1
Hydra with Hull Heavy Bolter - Squadron
Additional Hydra with Hull Heavy Bolter

Heavy Support 2
Manticore with Hull Heavy Bolter

Heavy Support 3
Manticore with Hull Heavy Bolter